
Markdown Course - Part 1 of 3
Learn how to use Markdown confidently to get your message across.

Table of contents
Introduction
Example
Headings
Styling
Link (internal, external)
Image
Lists (unordered, ordered, tasks)
Horizontal rule
Quote
Introduction
Markdown is used all over the Web; from GitHub to documentation to blogs.
It is an important skill to have as it allows you to communicate your message more clearly.
On GitHub alone, you will use Markdown for:
README file
Issue description
Issue comments
Pull Request description
Pull Request comments
Pull Request reviews
Pull Request inline comments
Release description
In this course you will learn how you can confidently use Markdown so that you can apply it to the above and more.
Before/After Example
Do you find your Issues, Comments, Pull Requests get ignored? It is highly likely that the DX (Developer Experience) for the user is not good as it could be making it difficult for them to digest.
Q. Which Issue would you rather read?
Without Markdown:

With Markdown:
This is how the above was created using Markdown only (no images were used). At first glance it might look a bit complicated to create, but by the end of the course, you will be able to create this yourself with confidence.
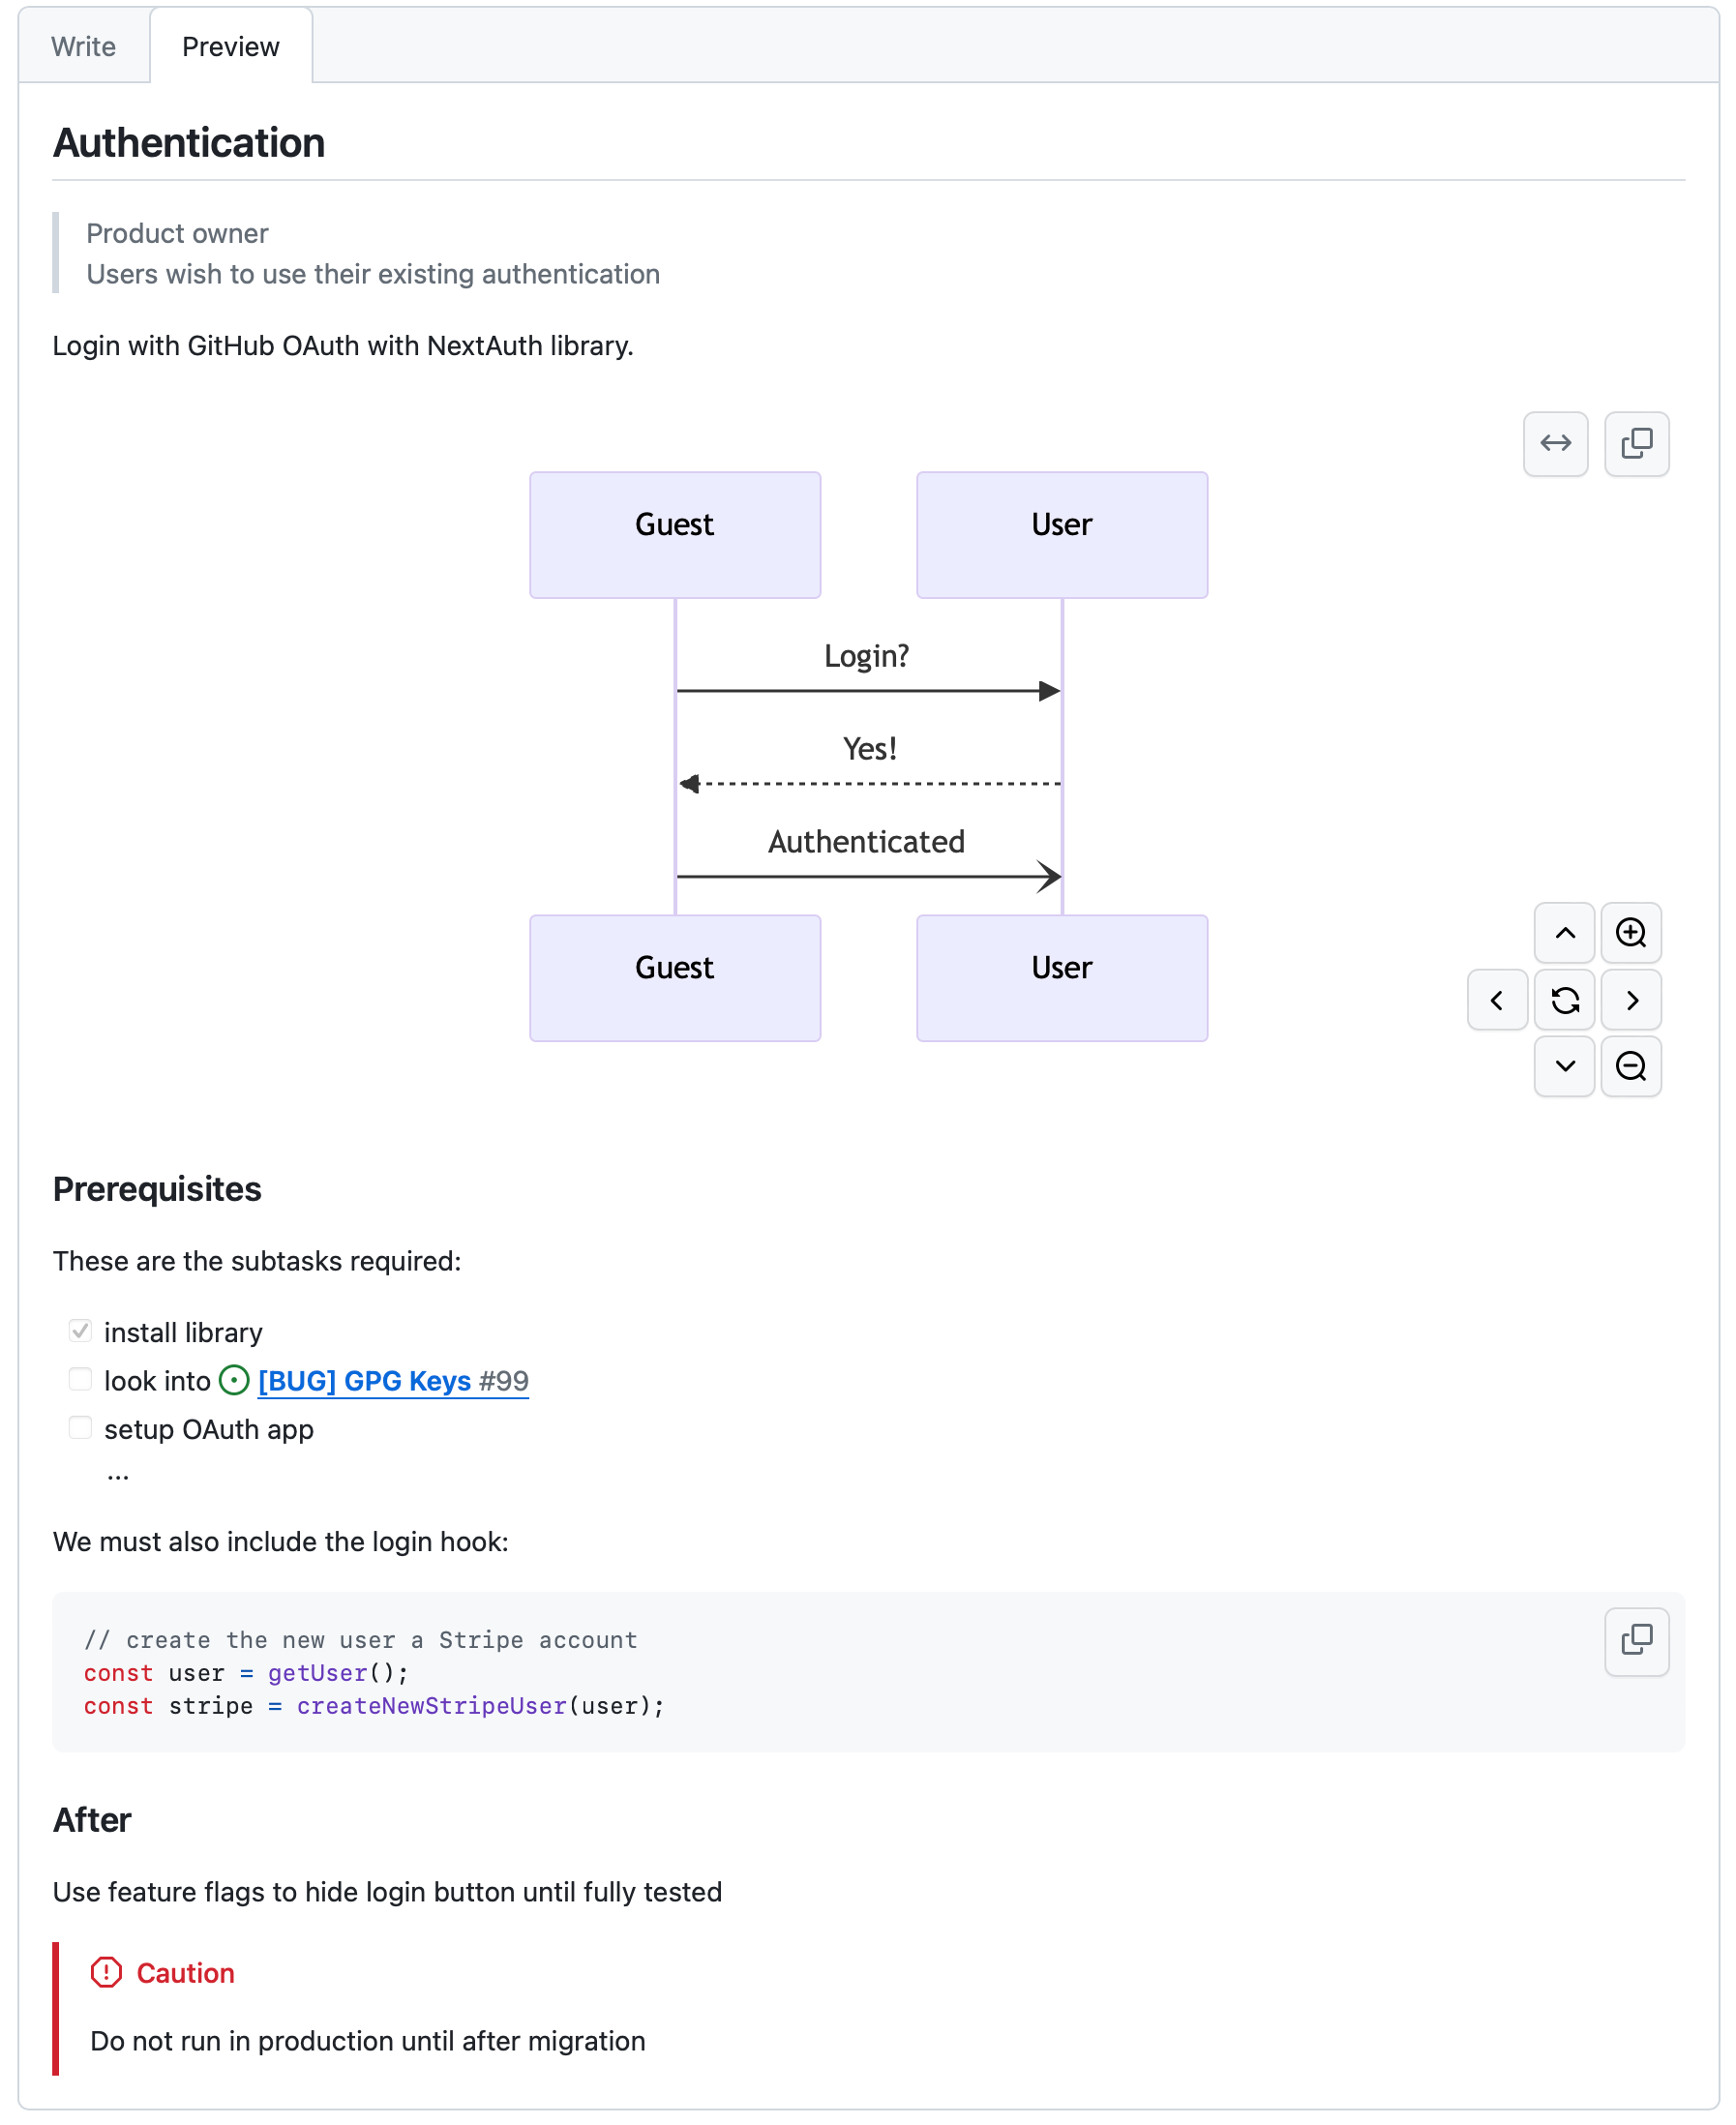
## Authentication

> Product owner
> Users wish to use their existing authentication

Login with GitHub OAuth with NextAuth library.

```mermaid
sequenceDiagram
    Guest->>User: Login?
    User-->>Guest: Yes!
    Guest-)User: Authenticated
```

### Prerequisites

These are the subtasks required:
- [x] install library
- [ ] look into https://github.com/eddiejaoude/eddiejaoude/issues/99
- [ ] setup OAuth app
...

We must also include the login hook:

```js
// create the new user a Stripe account
const user = getUser();
const stripe = createNewStripeUser(user);
```

### After

Use feature flags to hide login button until fully tested

> [!CAUTION]
> Do not run in production until after migration
Headings
Headings create the structure of our content. In Markdown a heading is started with a #. The number of # determines what type of Heading it is.
Here are the six Headings available in Markdown and how to achieve them:
# heading 1
## heading 2
### heading 3
#### heading 4
##### heading 5
###### heading 6
This is what the rendered output looks like:
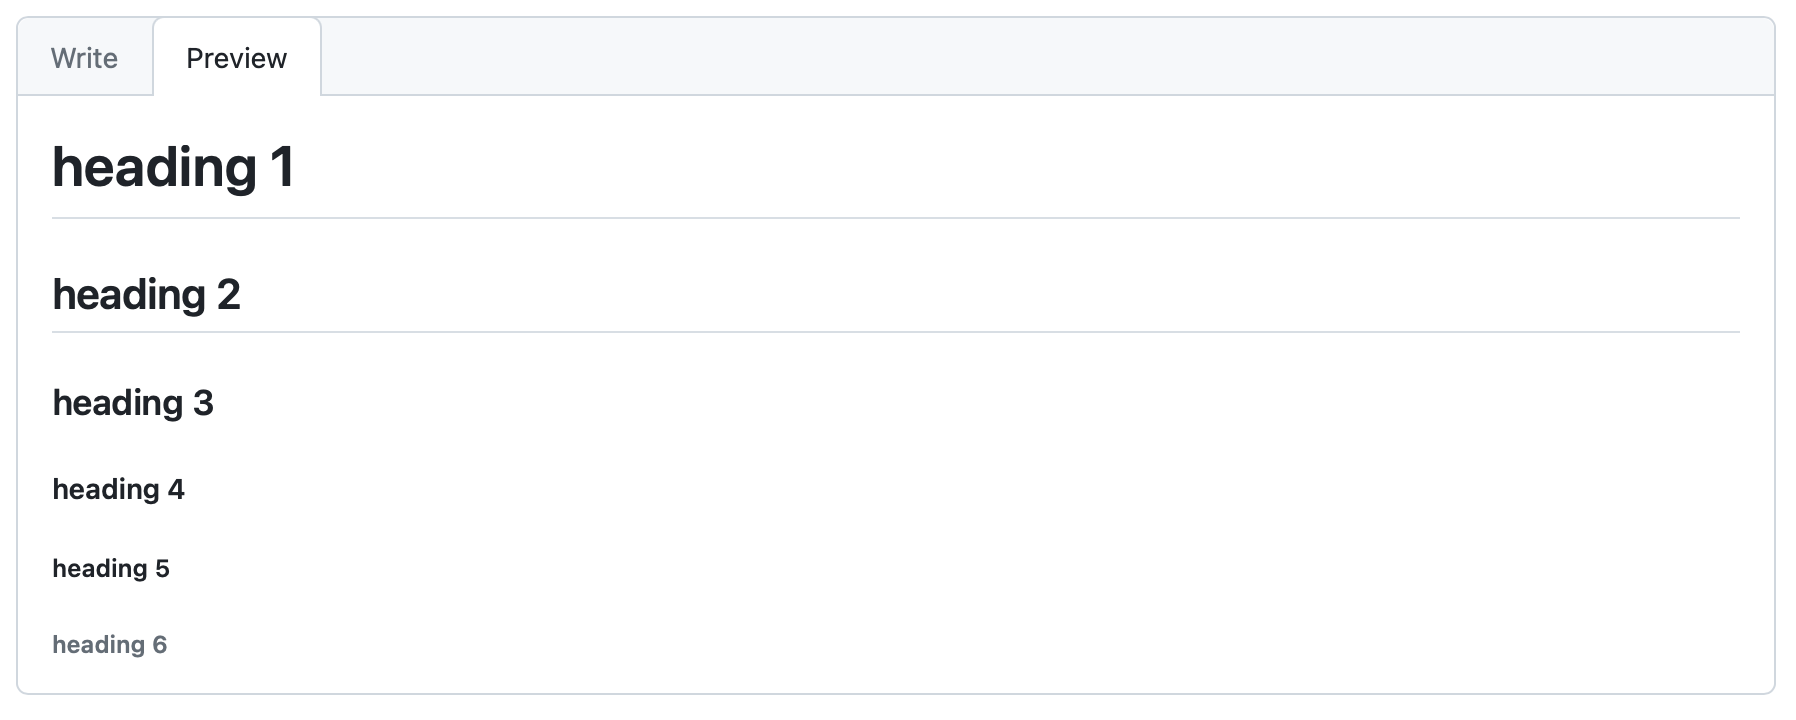
Markdown content is converted to html for the browser to understand. In the above example the tags are converted from <h1> through to <h6>.
IMPORTANT: Remember to have a space between the
#and your heading text.
Styling
When having paragraphs of text, we can add emphasis to help the reader digest the content. Examples of how we can make the text stand out are bold or italic.
This is how different Styling is created:
This is **bold** text

This is also __bold__ text

This is *italic* text

This is also _italic_ text

This is ~~strikethrough~~ text

We can mix the styles ***bold and italic*** with ~~***strikethrough***~~
This is what the rendered output will look like:

IMPORTANT: do not have a space between the styling and the text on either ends
These will both not work
* italic text*or*italic text *
Keep reading with a 7-day free trial
Subscribe to Eddie's Log to keep reading this post and get 7 days of free access to the full post archives.